

Metal engraving is a time-honored craft that combines artistry with technical skill to leave mark on everything from jewelry to industrial tools. It’s a process that involves incising a design onto a hard, usually flat surface, by cutting grooves into it. This tutorial walks beginners through the fundamental steps of metal engraving, helping transform novices into skilled engravers.
Understanding the tools and materials
Before diving into the engraving process, it is essential to familiarize yourself with the tools and materials required. Metal engraving generally involves a few key items:
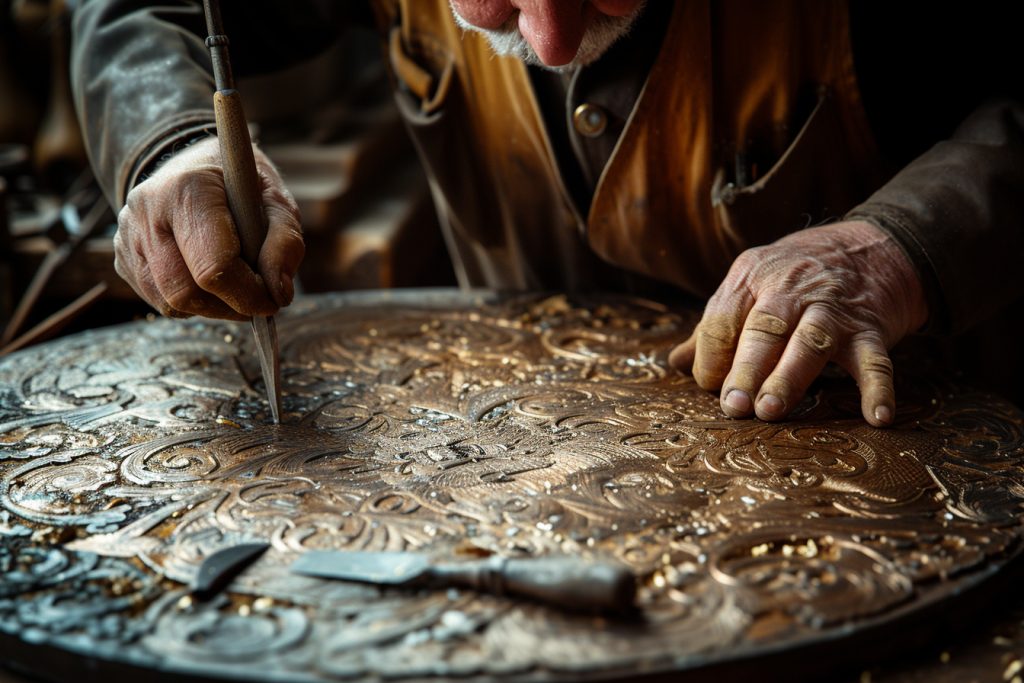
- Engraving Tools: These include hand-held gravers, also known as burins, of various shapes including flat, round, and knife-edge. For power assistance, pneumatic engraving tools are also common.
- Metal to Engrave: This is your canvas. Brass, copper, and sterling silver are excellent materials for beginners due to their softer composition.
- Vice or Clamp: To hold the metal steady while you work.
- Sharpening Tools: Gravers must be kept sharp to ensure clean cuts.
- Transfer Paper: For transferring your design onto the metal surface.
- Lubricant: To reduce friction and prolong the life of your engraving tools.
Setting up your workstation
A well-prepared workspace is critical for efficient and safe engraving. Your work area should be well-lit and organized, with tools within easy reach. Fix your metal piece in a clamp or vice securely to prevent movement during engraving. An optimal setup greatly affects the precision and quality of your work.
Preparing the metal surface
Start with a clean metal surface. Any dirt or grease can impact the transfer of your design and the quality of your engraving. Using a degreaser or rubbing alcohol, make sure the surface is clear of impurities. Once the metal is clean and dry, you’re ready to transfer your design.
Transferring your design
For consistent and proportionate engravings, it’s best to sketch your design on paper first. Once satisfied, transfer this design onto the metal surface using transfer paper. Trace over your design with a stylus or similar tool to ensure the lines are clearly imprinted.
Engraving techniques
With your design transferred, it’s time to start the engraving process. For beginners, it’s advisable to start with simple straight lines using a flat graver. Hold the tool in your dominant hand, thumb on the shaft, and use your other hand to guide the direction. Apply consistent pressure as you push the graver forward through the metal. This basic push engraving method is the foundation for more complex techniques.
Cutting techniques and textures
- Line Engraving: Involves creating a series of lines close to each other to form the design. This method emphasizes the outline and is a good starting point for beginners.
- Crosshatching: A technique where intersecting sets of parallel lines create shading and texture.
- Stippling: A pattern of dots that are used to create shading or textures.
As you progress with these techniques, variations in line width and depth can bring a dynamic element to your work.
Practicing shading and dimension

Adding shading to your designs creates depth and realism. By varying the pressure and angle of the graver, you can create different shades. Practice shading on scrap metal before attempting it on your project. The angle at which the graver meets the metal affects the width and darkness of your lines, so experimentation is key. Remember, patience and practice are vital for mastering shading in metal engraving.
Finishing your engraving
Once your design is fully engraved, remove any burrs or rough edges with a small file or sandpaper for a smooth finish. A polished engraving looks professional and refined. Final touches, such as adding background texture or patinas, can highlight the engraved design further.
Safety considerations
Metal engraving involves sharp tools and requires careful handling to avoid injury. Gloves can offer some protection, but maintaining tool control is paramount. Always work with your hands in a comfortable position to prevent fatigue, and regularly take breaks to reduce the risk of repetitive strain injuries.
Maintenance of engraving tools
Keeping tools sharp is essential to the quality of your engraving. After each session, inspect and sharpen your gravers to maintain their efficiency. Oiling pneumatic tools can also prevent wear and tear, ensuring they remain in good working order for your next metal engraving endeavor.
Continual learning
Metal engraving is a craft that rewards continued learning and practice. There are many resources available, from books and online tutorials to workshops and courses, that can expand your skill set. Engaging with a community of engravers can also provide encouragement, inspiration, and the exchange of techniques.
Crafting pristine and intricate designs in metal is an achievable goal for any aspiring engraver who dedicates time to perfect their technique. This tutorial lays the groundwork for your journey into the rewarding world of metal engraving.
Remember, every expert was once a beginner. With diligence and attention to detail, you’ll soon turn blank sheets of metal into pieces of art that can last for generations.